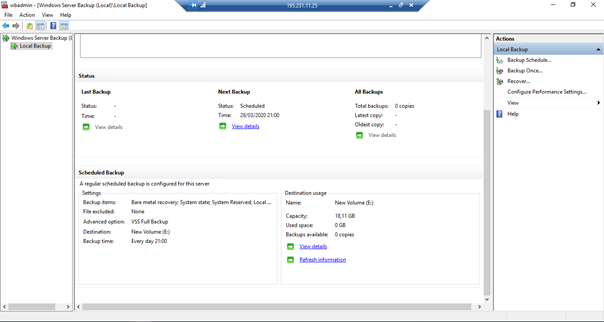
If you are a system administrator, backing up the servers you manage is essential to prevent the loss of important data. By configuring regular backups, you can restore your system in the case of an unexpected event, such as a crash. B. Hardware component failure, incorrect system configuration, or virus. You can find our article about backup strategies here.
If you use Windows Server, use the Windows Server Backup (WSB) solution from Microsoft to quickly and easily schedule backups of the entire server and specific storage volumes, files, or folders.
This tutorial will show you the process required to perform automated backups of cloud servers using Windows Server.
Windows Server Backup is a feature provided by Microsoft to create backup copies of servers. First, open the Windows Server Management Panel Dashboard, click Add Roles and Features and proceed to install this backup feature.

A multipart window will appear on the left. Feel free to skip the information requested in the first “Before You Begin” section and continue. Then in the second window “Installation type” select the “Role-based or feature-based installation” item and continue. In the Server Selection section, select the server on which to install Windows Server Backup and continue. Click Next to continue in the Server Roles section. Select the “Features” window, scroll and select the “Windows Server Backup” item and continue.
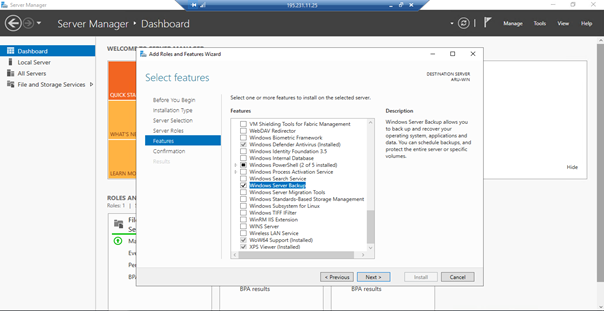
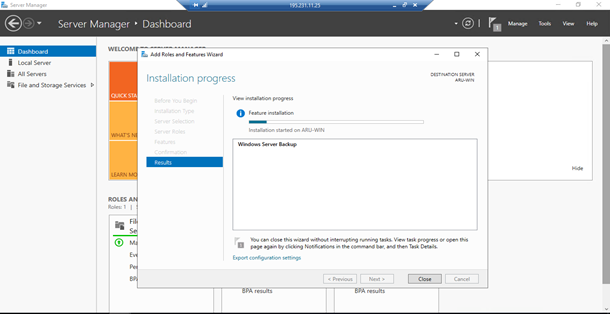
In the Confirmation section, select Automatically restart target servers as needed, and then click Install. Then wait for the installation to complete, then click Close.
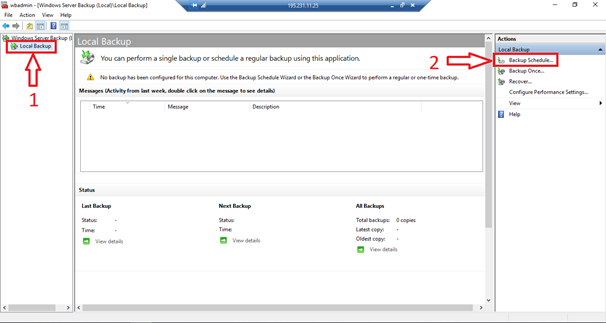
Once Windows Server Backup is open, select Local Backup on the left (1) and then click on Backup Schedule on the right (2) to configure the automatic backup rules.
A multipart window will appear. In the Getting Started section, just click Next to get started.
If you want to create a backup of the entire system, leave the entry “Full server” in “Choose a backup configuration“. Otherwise, select “Custom“ to specify only specific volumes, files, or folders for backup. Finally, click Next to proceed to the next section.
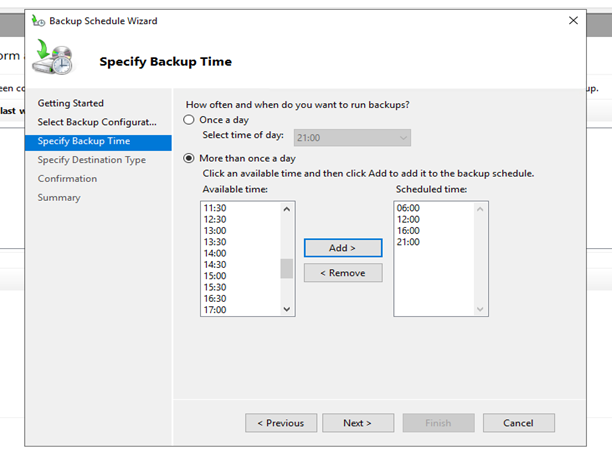
In the Specify Backup Time section, specify whether you want to back up once a day at a specific time (first bullet), or you want to always perform multiple backups on the same day (second bullet).
If you selected the “Several times a day” item, just select the desired time in the left column and click “Add”. To delete an incorrect time, simply click on the time in the right column and click Delete. After setting the backup frequency, click Next.
In the “Specify Destination Type” section, you will be requested where to store your backup file. Each storage option has its pros and cons, each listed in its respective item. So, consider carefully where to store your backup.
There are three options available:
After selecting the option that suits you, click on”Next”. In this example, the option “Saving to volume” is selected.
At this point, the “Confirmation” section shows a summary of the backup settings you have chosen. Click on “Finish” to schedule the backup. When finished, click on “Close”.
